Mobile App Preparation
Before we dive in to the actual development, we need to do some preparation work. Here we will go over Android as the target platform.
1. Installation
First step is to make sure you got the Cordova CLI installed and the necessary SDKs.$ yarn global add cordova
# or:
$ npm install -g cordova
After this step you will need to install the Android platform SDK on your machine. You can download the Android Studio here and follow these installation steps afterwards.
Add Android installation to your path
Unixexport ANDROID_HOME="$HOME/Android/Sdk"
PATH=$PATH:$ANDROID_HOME/tools; PATH=$PATH:$ANDROID_HOME/platform-tools
Please note that sometimes the
/Android/Sdkfolder is added inside/Library/inside your user folder. Check your user folder and if the/Android/folder is only inside/Library/do:export ANDROID_HOME="$HOME/Library/Android/Sdk"instead.
Windowssetx ANDROID_HOME "%USERPROFILE%\AppData\Local\Android\Sdk"
setx path "%path%;%ANDROID_HOME%\tools;%ANDROID_HOME%\platform-tools"
Start Android studio by changing into the folder you installed it in and run
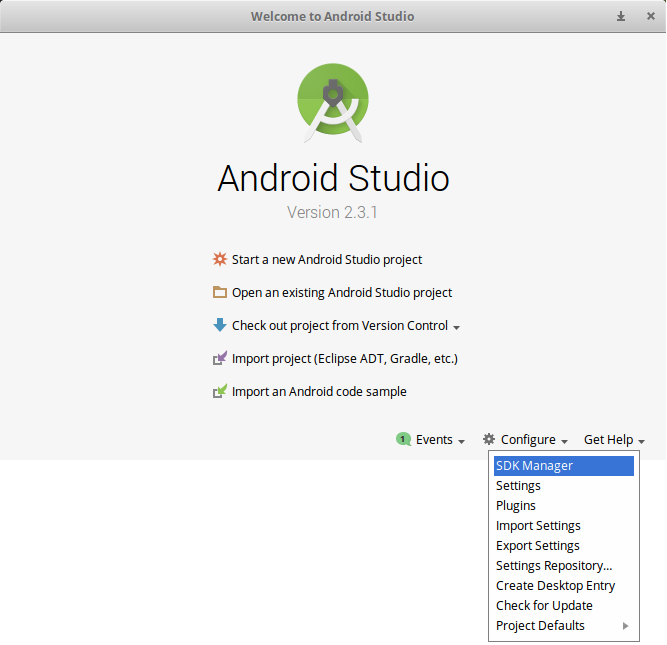
./studio.sh. Next step is to install the individual SDKs:Open the “Configure” menu at the bottom of the window:

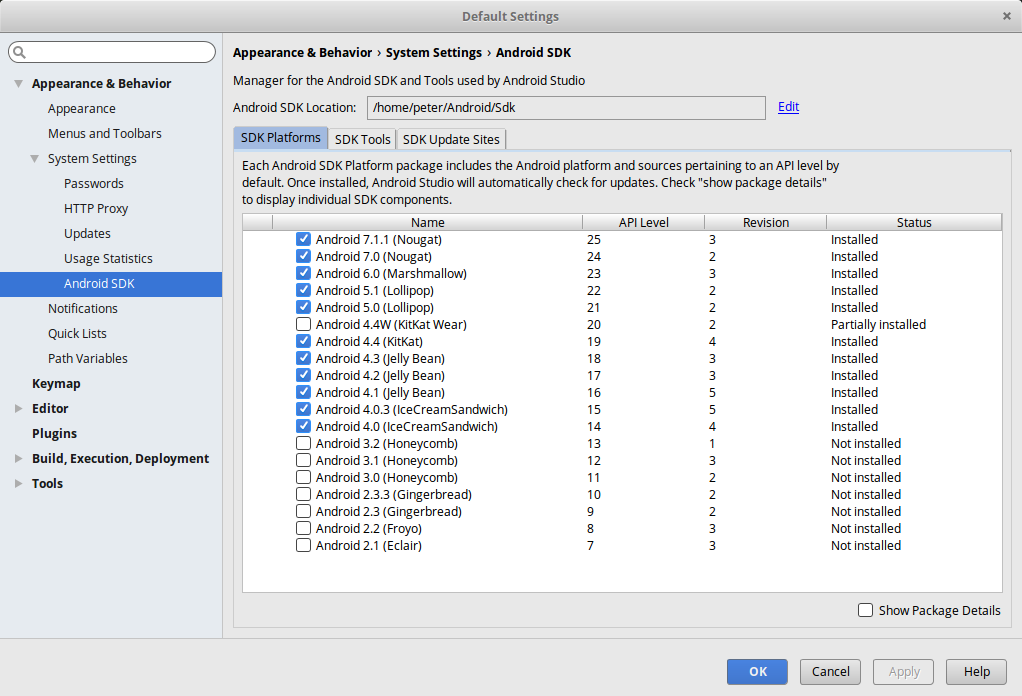
Select the desired SDKs. As per August 2018 Cordova supports 5.0 and up and click on “Apply” to install the SDKs.

2. Add Cordova Quasar Mode
In order to develop/build a Mobile app, we need to add the Cordova mode to our Quasar project. What this does is that it uses Cordova CLI to generate a Cordova project in /src-cordova folder. /src-cordova/www folder will be overwritten each time you build.$ quasar mode -a cordova
3. Add Platform
To switch to the cordova project, type:$ cd src-cordova
To add a target platform, type:$ cordova platform add [android|ios]
To verify that everything is in order, type:$ cordova requirements
On some newer Debian-based operating systems you might face a very persistent problem when running
cordova requirements. Please see the “Android SDK not found” after installation section for assistance.
4. Start Developing
If you want to jump right in and start developing, you can skip step #2 and #3 commands and issue:$ quasar dev -m cordova -T [android|ios]
This will add Cordova mode and project automatically, if it is missing.
 Quasar

